
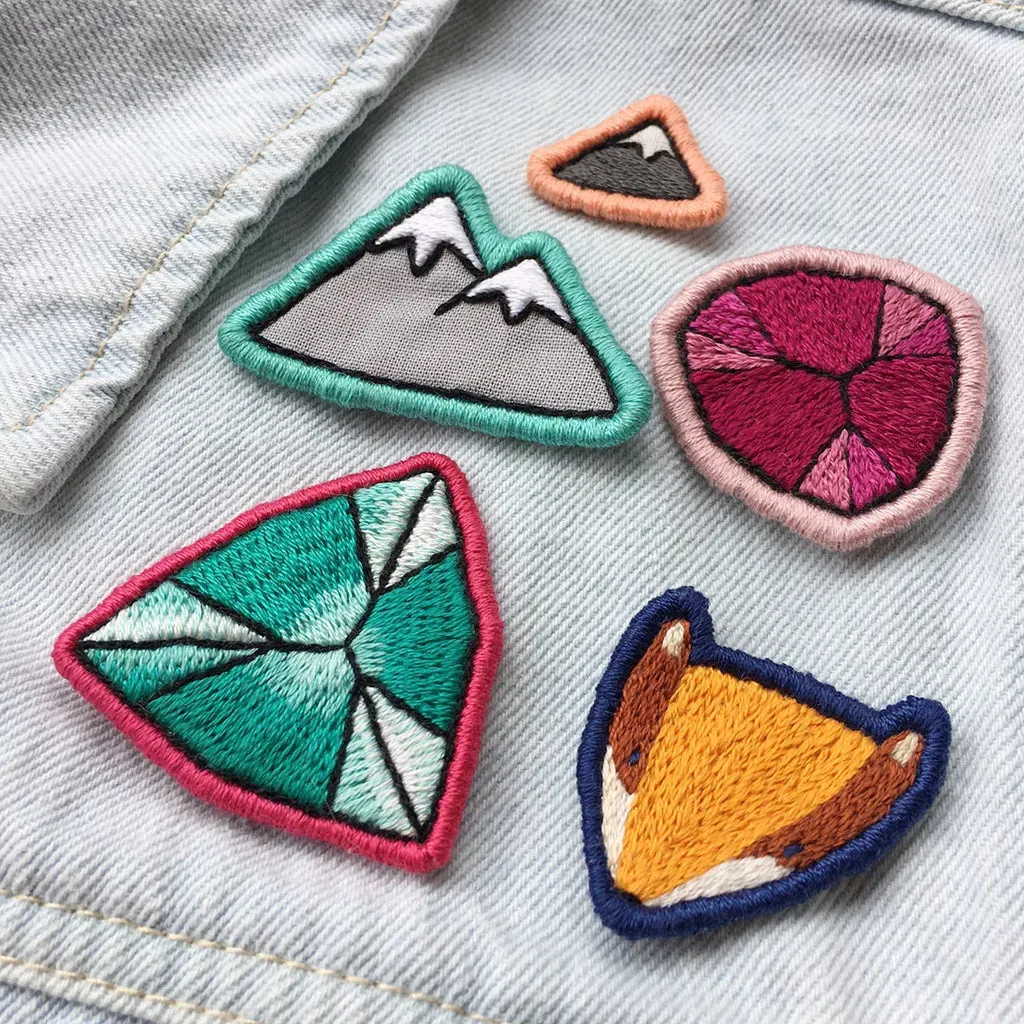
DIY patches open up a world of creativity, letting you create custom patches at home that turn tired garments into personalized statements you can wear with pride. From adding bold iron-on patches on denim to applying sew-on patches for durability, patches let you transform backpacks, jackets, and gifts while expressing your style. In this guide to patch making supplies and techniques, you'll learn how to plan, design, and apply patches that last, whether you choose a quick iron-on update or a durable finish. You'll find practical guidance and patch design ideas that suit beginners and veterans alike, along with care tips to keep colors bright and edges neat. By the end, you'll have a simple, repeatable process for turning fabric scraps into high-quality embellishments you can wear or gift.
In other words, these small fabric appliqués are a simple form of home crafting that upgrades wardrobes and bags with personality. Whether you call them handmade fabric patches, decorative badges, or custom fabric appliqués, the idea remains the same: a wearable accent made at home. This approach can involve adhesive-backed options for speed or stitched embellishments for longevity, offering a spectrum from quick fixes to durable finishes. As you explore ideas, consider bold shapes, high-contrast colors, and clean edges to ensure the patch stands out whether on a jacket or bag.
DIY Patches at Home: Personalize Clothing and Accessories
DIY patches at home let you transform worn elbows on denim, backpack covers, or tote bags into statements of style. By starting with your favorite fabrics, scraps, or even felt, you can create custom patches at home that reflect your personality. This approach blends creativity with practicality, turning ordinary garments into conversation starters. When you embrace the DIY patches mindset, you're not just decorating; you're upcycling, preserving memories, and building a portable gallery of your taste.
From the first sketch to the final iron-on or sew-on patch, plan around how the patch will be used. Consider the fabric type, the target wear, and whether you want bold colors for quick visibility or nuanced hues for a subtle chic effect. This framing helps you work with patch making supplies that support durable adhesion and clean edges, ensuring your designs survive washes and daily wear, and that your custom patches at home stay vibrant over years of use.
Essential Patch Making Supplies for Clean, Durable Patches
A solid toolkit of patch making supplies is the backbone of successful projects. Start with a patch base made of fabric scraps or felt, add stabilizer to prevent distortion, and stock sharp scissors, rulers, and embroidery floss. Having the right supplies speeds up your workflow and improves the finish. Indoor lighting, a stable cutting mat, and good pins also contribute to cleaner edges and safer transfers when you move from idea to fabric.
For iron-on patches, you’ll need reliable heat and a safe workspace; for sew-on patches, a sturdy sewing machine or a patient hand-sew setup makes all the difference. Keeping a small amount of fabric glue on hand can help hold pieces in place during layout. When you house these patch making supplies, you’re setting up the conditions for crisp edges, accurate shapes, and consistent stitching every time.
Design Ideas to Inspire Your Patch Projects
Design ideas are the spark that turns fabric scraps into wearable art. Start by identifying where the patch will appear and what mood you want to convey, then explore patch design ideas that yield simple silhouettes or intricate embroidery. Limiting the color palette to two to four high-contrast colors helps maintain legibility from a distance, making your designs pop on jackets, backpacks, or accessories. Experiment with shapes that photograph well, as clean edges translate well when you apply the patch later.
Transfer your chosen concept to a template sized for your patch and test it on fabric or stabilizer. Use tracing paper or transfer sheets to keep lines crisp, and remember that high-contrast edges help the patch read clearly even through busy fabrics. If you’re aiming for cohesive storytelling, plan several patches around a common theme or color system—this is a great way to align with the idea of patch design ideas and, more broadly, to create a set of custom patches at home that work together.
Iron-On Patches vs Sew-On Patches: Choosing the Right Method
Iron-on patches vs sew-on patches represent two ends of the speed-versus-durability spectrum. Iron-on patches fuse with heat and pressure, delivering quick customization on denim, canvas, or cotton blends. They’re ideal when you want a fast upgrade on items you wear frequently or gift with minimal fuss. Sew-on patches, however, are anchored by stitching that remains robust even after repeated washing, making them a reliable choice for heavy-use items and fabrics that don’t tolerate heat well.
Choosing between iron-on patches and sew-on patches depends on fabric type, wash routine, and how long you want the patch to last. Some projects benefit from combining both methods—an iron-on base for speed with a securing sew-on edge for durability. In this guide, you’ll find practical, step-by-step approaches for both methods so you can tailor your process to the garment and your lifestyle.
Step-by-Step: Iron-On Patch Technique
Step-by-step: Iron-On Patch Technique provides a concise workflow to get visible results quickly. Start by cutting your patch base and any design elements, optionally adding stabilizer to prevent puckering. Position the patch where desired, then cover with a thin cloth and apply heat using a suitable setting for your fabric. Press in even, deliberate intervals to ensure the adhesive bonds across the surface.
After the initial bond cools, test adhesion and, if needed, re-press to reinforce the attachment. For extra security, you can sew a narrow zigzag or blanket stitch around the edge to lock the patch in place while preserving the convenience of the iron-on method. This combination approach blends speed with durability, aligning with the practical needs of DIY patches for everyday wear.
Step-by-Step: Sew-On Patch Technique
Step-by-step: Sew-On Patch Technique walks you through a traditional, durable method that stands up to frequent washing. Begin with your base and design pinned in place, then choose a tight zigzag stitch or satin edge that seals the perimeter against fraying. If you’re using a sewing machine, select sturdy stitch settings and guide the needle slowly to maintain even spacing along the edge.
If you prefer hand-stitching, work with small, evenly spaced stitches and reinforce the center or stress points after the edge is secured. Once the patch is fully attached, you can add topstitching for a decorative finish that also protects against wear. By combining careful technique with quality patch making supplies, sew-on patches offer sustained performance on items that undergo heavy use.
Frequently Asked Questions
What patch making supplies do I need for DIY patches at home?
For DIY patches at home, start with a patch base such as fabric scraps or felt, plus stabilizer to prevent stretching. Gather sharp scissors, a ruler or rotary cutter, embroidery floss or sewing thread, needles, and pins for careful assembly on a sturdy work surface. For iron-on patches, have an iron, a heat-resistant mat, and optional transfer paper or a printed template. For sew-on patches, you’ll want a sewing machine (or a good hand-sewing setup) and a tight zigzag or satin stitch for clean edges; a little fabric glue can help hold pieces in place during assembly.
How do I choose between iron-on patches and sew-on patches for my DIY patches at home?
Iron-on patches are fast and easy, fusing with heat for quick customization on denim or canvas but may be less durable in high-wear areas. Sew-on patches are more durable through washing and wear, especially on heavy fabrics, though they require more time and a sewing setup. You can also combine both on a single piece for extra flair.
What are some patch design ideas for custom patches at home?
Start with bold, high-contrast shapes using two to four colors. Consider motifs from hobbies, travel, quotes, or logos, then sketch options and create a clean template. Aim for defined edges that photograph well when applied to garments or bags.
What are the steps to apply iron-on patches for DIY patches at home?
Cut and prepare the patch base, place stabilizer on the wrong side, position the patch on the garment, cover with a thin cloth, and press with a hot iron in 10–15 second intervals until adhered. Let it cool, test the adhesion, and reseal edges by sewing a narrow zigzag or blanket stitch for extra security.
How can I sew-on patches for DIY patches at home?
Pin the patch where you want it, choose a coordinating thread, and sew around the edge with a tight zigzag or satin stitch. Use a sewing machine for speed or hand-stitch if you prefer; reinforce the center or stress points, then optionally topstitch for a decorative finish.
How should I care for DIY patches after applying them to protect my custom patches at home?
Wash garments with patches inside out on a gentle cycle in cold or warm water, and air dry to maximize longevity. If any edge lifts, re-sew or re-press the patch, and check heat settings to prevent damage to adhesives or stitching. Avoid hot dryers, which can loosen patches over time.
| Topic | Key Points |
|---|---|
| Introduction | DIY patches breathe new life into old clothing, personalize bags, and create meaningful gifts. They’re practical upgrades, not just decorative details; two main methods (iron-on for speed, sew-on for durability) make patching accessible. |
| Two Main Methods | Iron-on patches fuse with heat for quick customization; sew-on patches are durable and hold up to frequent washing. |
| Patch Making Supplies | Core supplies: fabric scraps or felt, stabilizer, sharp scissors, ruler or rotary cutter, embroidery floss or thread, needles, pins, and a sturdy work surface. Iron-on needs an iron, heat-resistant mat, and transfer paper/template; sew-on needs a sewing machine or hand-stitch setup and zigzag/satin edge; fabric glue optional. |
| Designing Your Patch Concept | Consider placement and message; choose bold shapes or embroidery; keep color palette to 2–4 colors with high contrast; sketch options and create a clean template; transfer to fabric or stabilizer using tracing or transfer sheets. |
| Iron-On Patch Step-By-Step | 1) Cut patch base; 2) Add stabilizer on the wrong side; 3) Position patch; 4) Press with iron at high heat for 10–15 seconds in sections; 5) Cool and test adhesion; 6) Optional edge stitching for added security. |
| Sew-On Patch Step-By-Step | 1) Prepare design and base; 2) Choose matching thread; 3) Sew around edge with sturdy stitch; 4) Hand-stitch if no machine; 5) Add reinforcing stitches; 6) Topstitch along edge for protection. |
| Care & Maintenance | Avoid high-heat drying; wash patches inside out on gentle cycle with cold or warm water; air-dry is best; re-sew or re-press if lifting; check adhesion and adjust heat/settings as needed. |
| Tips for Patch-Making Success | Pre-wash fabrics; use stabilizer on stretchy fabrics; outline with darker thread for contrast; keep a fabric swatch book to test adhesion and colorfastness; practice on scrap fabric to calibrate heat and tension. |
| Inspiration & Ideas | Patch themes like hobbies, travel memories, quotes, or logos. Create a cohesive set across a jacket or backpack, or mix patches for interchangeable looks; use high-contrast shapes for readability on the move. |
Summary
DIY patches offer a rewarding way to blend creativity with practicality. By choosing iron-on patches for speed or sew-on patches for durability, crafters can tailor garments, bags, and gifts with personality. With the right supplies, thoughtful design, and proper care, patches stay vibrant wash after wash. Start small, experiment with different textures and shapes, and let your patches tell your story.